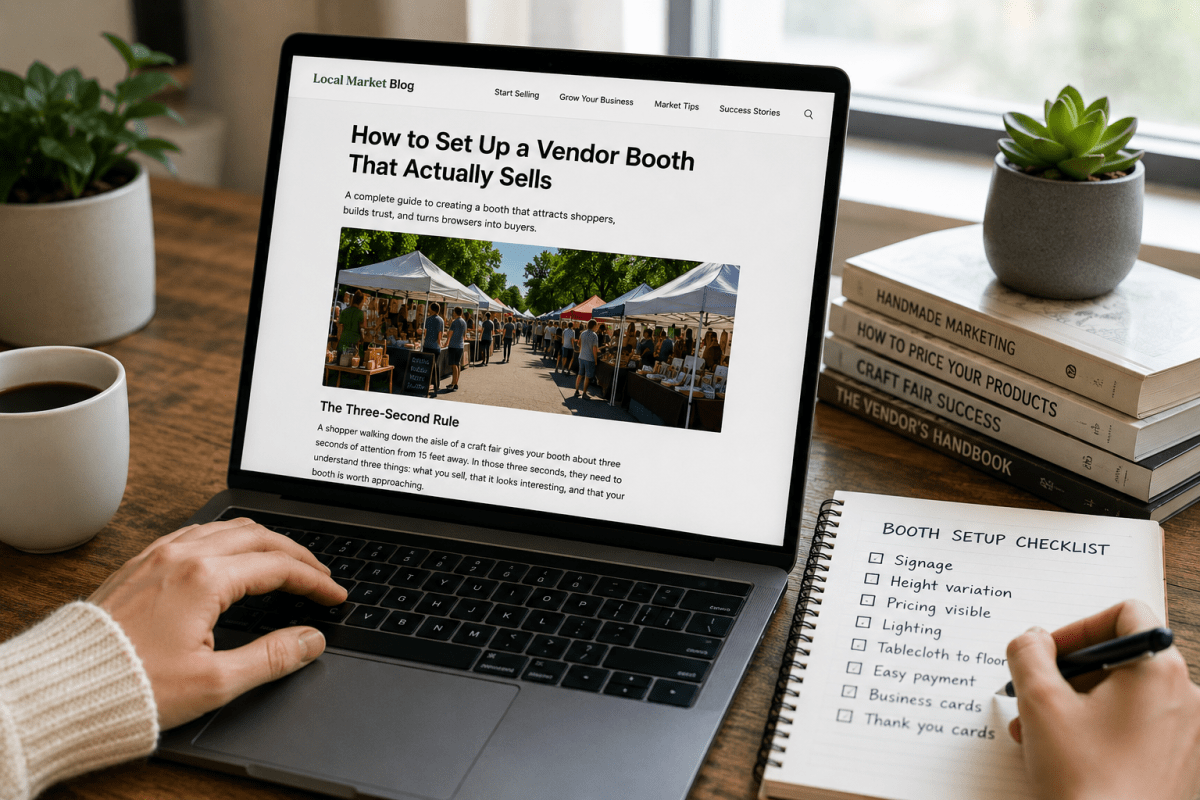
Most first-time vendors spend weeks perfecting their products and almost no time thinking about their booth. Then they show up to a craft fair, lay everything flat on a table, sit behind it staring at their phone, and wonder why nobody stopped.
Your booth is your storefront. Shoppers decide whether to walk up or walk past in about three seconds from 15 feet away. Everything about your setup, from the height of your display to the size of your sign, is either pulling people in or pushing them past. This guide covers what actually works, what wastes your money, and how to set up a booth that converts browsers into buyers.
The Three-Second Rule
A shopper walking down the aisle of a craft fair gives your booth about three seconds of attention from 15 feet away. In those three seconds, they need to understand three things: what you sell, that it looks interesting, and that your booth is worth approaching. If any of those three things are unclear, they keep walking.
This means the most important part of your booth isn't your product. It's your visibility. A beautiful handmade necklace sitting flat on a black tablecloth is invisible from 15 feet away. That same necklace hanging at eye level on a display panel with a spotlight on it catches attention from across the aisle. The product didn't change. The presentation did.
Everything in this guide is designed around that three-second window. If a tip doesn't help you pass the three-second test, it doesn't matter.
Your Sign: The Most Underrated Element
Your business name sign is the single most important thing in your booth. Not your best product. Not your prettiest display piece. Your sign. Because it's the first thing that communicates "this is a real business worth stopping at" versus "this is someone's hobby table."
The sign needs to be readable from 15-20 feet away. Most first-time vendors make signs that look great from 2 feet away and are completely invisible from the aisle. If you can't read your own sign from across a parking lot, it's too small.
What works: a clean, simple banner with your business name in a large font, your logo if you have one, and optionally a one-line description of what you sell if your name doesn't make it obvious. Hang it across the top of your canopy or behind your table at eye level. Professional-looking banners from Vistaprint or similar services cost $30-60 and last for years.
What doesn't work: small chalkboard signs with cursive writing. Printed paper taped to the table. Signs that list your social media handles instead of your business name. Signs that are beautiful but use thin, decorative fonts nobody can read from a distance.
If you're choosing between spending money on product inventory or a good sign, buy the sign. You can sell products from a box if your sign pulls people in. You can't sell products nobody sees because they walked past your invisible booth.
Height Variation: The Display Trick That Changes Everything
The most common mistake first-time vendors make is laying everything flat on a table. From a distance, a flat table full of products looks like a garage sale. Everything blurs together into one surface that the eye skips over.
Height variation means displaying products at multiple levels so there's visual depth to your booth. Some items at table height, some at mid-level on risers or crates, some at eye level on display panels or shelves. When products sit at 3-4 different heights, the booth feels dimensional, interesting, and intentional.
How to create height variation cheaply: wooden crates from a craft store ($5-15 each), small risers or step shelves, stacked boxes draped with fabric, gridwall panels behind the table for hanging products, and table-top easels for art and signs. You don't need expensive fixtures. You need things that lift products off the table surface.
The back of your booth should be the tallest. This creates a "wall" that catches the eye from across the aisle. Gridwall panels, pegboard, or a backdrop display behind your table give you vertical real estate that flat tables don't have. Hang your most eye-catching products at eye level on this back wall. These are your billboards, the pieces that pull people toward your booth from a distance.
The front of your table should have your lowest-priced, most accessible items. These are impulse buys that people can pick up without committing. The middle zone holds your mid-range products. The back wall holds your statement pieces and higher-priced items. This creates a natural browsing flow from casual to committed.
Tablecloths: Simple but Critical
Your tablecloth goes to the ground on all four sides. No exceptions. The space under your table is where you store extra inventory, your personal bag, water bottles, and everything else you don't want shoppers to see. A tablecloth that stops at the table edge exposes all of that and makes your booth look messy.
Pick one color and stick with it across every surface. Mismatched tablecloths (one table with white, another with a patterned fabric, a third with black) make your booth look like three separate setups instead of one cohesive brand. Solid colors work best because they don't compete with your products for attention. Black, navy, and white are the most popular because they make most products pop.
Fitted table covers that wrap snugly around the table look more polished than flat tablecloths that drape loosely. They're about $15-25 each and worth the upgrade if you're doing events regularly.
Pricing: Make It Visible and Clear
If a shopper has to ask "how much is this?" you've already created a barrier. Many people are too shy or too busy to ask. They'll pick something up, look for a price, not find one, and put it back down. You lost a sale because of a missing sticker.
Every single item should have a visible price. For individual items, a small tag or sticker works. For grouped items (a bin of keychains, a row of candles), a clear sign with the price visible from a few feet away works better than tagging each one.
Price signs should be readable without the customer having to lean in. "Stickers $3.50" in small handwriting on a tiny card is hard to read. The same price on a 4x6 card in a mini frame is effortless. The easier you make it for people to understand your pricing, the more they buy.
If you have a range of price points, make sure that's clear too. A sign that says "Earrings $12-28" tells someone immediately whether they're in their budget. Without that information, they might assume everything is expensive and skip your booth.
We cover pricing strategy in depth in our booth fee pricing guide. The same margin logic applies to product pricing.
The Canopy: Your Most Important Equipment Purchase
If you're doing outdoor events, a 10x10 canopy is non-negotiable. Most events require one. Even events that don't require one will leave you exposed to sun and rain without one.
Don't cheap out here. A $60 Amazon tent will flip in the first wind gust, especially when your products act like sails. A quality canopy with a steel or aluminum frame costs $150-250 and lasts for years. ABCCanopy makes solid options in that range that hold up well at outdoor markets.
Tent weights are equally important. Get at least 25 pounds per leg, ideally 40. Water jug style weights are affordable and easy to transport. Sand bags work too but they're heavier to carry. Don't rely on stakes alone — many events are on asphalt or concrete where stakes won't work, and even on grass, stakes aren't enough in a real wind gust.
White canopies are the most versatile and some events specifically require white tents for a cohesive market look. If you only buy one canopy, make it white. You can always add personality with banners, string lights, and decorations.
For more gear recommendations, check out our vendor gear guide with everything you need for a complete booth setup.
Lighting: Underrated for Indoor and Evening Events
At an outdoor daytime market, the sun does the work. But at indoor events, evening markets, and under a canopy on a cloudy day, lighting makes the difference between a booth that glows and one that disappears into the shadows.
String lights or fairy lights draped around your canopy frame add warmth and draw the eye. They're cheap, battery-powered options are available everywhere, and they make any booth feel more inviting. LED clip-on spotlights aimed at your best products create focal points that pull attention to specific items.
For vendors selling anything that benefits from close-up inspection (jewelry, art, detailed crafts), a small desktop lamp or spotlight aimed at your display area is essential at indoor events. People can't buy what they can't see.
Layout: Creating a Browsing Flow
Your booth layout should guide shoppers through a natural flow. Most craft fair booths are set up with a table across the front acting as a barrier between the vendor and the customer. This works but it keeps shoppers at arm's length. The best-performing booths at markets invite shoppers IN.
If your space allows it, set up a U-shape or L-shape with tables on the sides and an open front. Shoppers walk into your booth space rather than standing outside it. This creates an enclosed, boutique-like experience where shoppers feel like they're browsing a shop, not looking at a table from behind a line.
If you have a standard single-table setup, angle your products toward the aisle. Everything on your table should face the direction shoppers walk from, not face you sitting behind the table. If your products are facing you, they're backwards to every single person walking the aisle.
Keep the path into and through your booth clear. Don't block the entrance with a sign, a display rack, or your chair. Every obstacle between the aisle and your products is a reason for someone to keep walking.
Product Grouping: Organize Like a Store
Group products by type, by use case, or by price point. A cluster of earrings together, a cluster of necklaces together, bracelets in their own section. Or group by theme: "gifts under $20" in one area, "statement pieces" in another. This helps shoppers self-navigate to what they want.
When products are scattered randomly across a table, shoppers' eyes don't know where to land. It feels overwhelming and they disengage. When products are grouped logically, the eye moves naturally from one group to the next and the browsing experience feels effortless.
Leave some breathing room between groups. Cramming every inch of table space with product makes the booth feel cluttered and overwhelming. White space (or tablecloth space) between product groupings makes each group stand out and feel intentional.
Price Point Strategy: Have a Range
Your booth should have something at every price level: a low-end impulse buy ($5-15), a mid-range core product ($20-50), and a high-end statement piece ($75+). The impulse buy gets people to pull out their wallet. The core product is where most of your revenue comes from. The statement piece draws attention and makes the mid-range products feel affordable by comparison.
If all your products are $50+, you'll get plenty of "I love your work" and very few sales. If all your products are $5, you'll make sales but you'll struggle to cover your booth fee. The mix is what works. The small item gets the wallet out, and once the wallet is out, the upgrade to a mid-range item is an easy yes.
The Essentials Checklist
Here's everything you should bring to every vendor event, beyond your products and display. Forgetting any of these can cost you sales or make your day miserable.
Card reader (Square, SumUp, or similar). This is non-negotiable. Half or more of your customers will want to pay with a card. If you're cash only, you're leaving money on the table. Literally.
Cash box with small bills and coins for making change. Even with a card reader, some people pay cash. Start with at least $50 in small bills and coins.
Bags for purchases. Paper bags, tote bags, tissue paper for wrapping delicate items. A branded bag with your business name on it is even better because the customer carries your marketing around the market.
Business cards or QR code linking to your social media, website, or online shop. People who don't buy today might follow you and buy later. Make it easy for them to find you after the event.
Email signup sheet or tablet. Building an email list of customers who visited your booth is more valuable long-term than any single sale. Even a simple clipboard with "Sign up for updates and exclusive offers" works.
Phone charger or battery pack. Your card reader runs on your phone. If your phone dies, you can't take card payments. Bring a charger.
Water, snacks, and sunscreen. You'll be standing for 4-8 hours. Don't wait until you're dehydrated and starving to realize you forgot to eat.
Zip ties, clips, tape, scissors, and a basic tool kit. Something will break, fall down, or need to be secured on event day. Be ready.
A mirror (if you sell wearable items like jewelry, hats, scarves). Shoppers buy more when they can see themselves wearing the product.
The Biggest Mistake: Sitting Behind Your Table on Your Phone
This one tip will increase your sales more than any display trick. Stand up. Stand to the side of your table, not behind it. Make eye contact with people walking past. Smile. Say "hey, feel free to look around" or give a simple nod. That's it.
Vendors who sit behind their table staring at their phone create an invisible wall between themselves and shoppers. People don't want to disturb you. They don't want to feel like they're bothering someone. So they keep walking. Standing to the side, looking approachable, and making brief eye contact invites people in without being pushy.
You don't need to be a salesperson. You don't need a pitch. You just need to be present and approachable. The products and the display do the selling. Your job is to not get in the way of a sale happening.
Picking the Right Events
The best booth setup in the world won't save you at the wrong event. A jewelry vendor at a produce-only farmers market or a pet treat vendor at a wine-and-art evening are at the wrong event for their product. The crowd matters as much as the display.
Before applying to any event, ask yourself: does this event attract the type of shopper who buys what I sell? A curated makers market with a $3 admission fee attracts serious shoppers who came to buy. A free community fair attracts families browsing casually. Both can work depending on your product, but they're very different selling environments.
Also verify the event is real before you pay any booth fees. Vendor event scams on Facebook have been increasing rapidly in 2026, with scammers creating fake event pages and collecting booth fees from vendors. We covered this in detail in our guide on how to spot a vendor application scam, and you can use our free Scam Checker tool to evaluate any event in 60 seconds.
For finding verified events where you know the organizer is real and the event is legitimate, browse verified markets on Local Market.
After the Event: Track Everything
The vendors who improve fastest are the ones who track their data. After every event, write down: total sales, number of transactions, best-selling product, worst-selling product, estimated foot traffic, booth fee paid, and whether you'd do this event again.
After a full season of tracking, you'll have real data on which events are worth your time, which products to make more of, and what price points your customers respond to. That data is worth more than any advice in any guide because it's specific to your business, your products, and your market.
If you're new to selling at events and want a full walkthrough of everything covered here plus pricing, finding events, and building your vendor business, check out the free Local Market Vendor Academy.
Set up well. Show up prepared. The sales follow.